
Today we want to address the topic of “Repainting the house exterior”, and at the same time give the rendering a good beating. While painting your own four (interior) walls is not a problem for most people, painting an exterior wall is a considerably more demanding task. We’ll explain how it’s done, what preparation is necessary and how long the rendering needs to dry before you even think of painting.
A word in advance: Exterior walls should only be painted during the right season. In winter it is too cold for the paint to dry. On the other hand, it can be so hot in the summer that the paint dries much too quickly. And what is also very important: before the painting work can begin, the underlying surface must be thoroughly inspected. This is because painting the house exterior is a demanding and expensive task. If the facade is not properly prepared and any damage rectified, this will show up again after a short time. Here, the following steps have proven successful:
• The visual inspection
Immediately obvious are discolouration, loose paint layers, dirt accumulation and moss formation. While it is possible to remove plant residues with water and a brush, you should remove the dirt with a pressure washer. But be careful – before you begin painting after cleaning the facade, it must be completely dry. Take into account the fact that the water can penetrate quite deeply into the render and needs some time to dry out.
To be absolutely certain, you should use our BM31 Moisture Meter. With this instrument, the distribution of moisture in walls, floors and ceilings can be quickly located.
• The wipe test
For this, brush your hand over the surface. Is there white dust on the inside of your hand? This means that the wall is very chalky, which indicates the use of lime paint. If you would like to use a modern exterior wall paint, such as a water-based paint, you must first remove the lime paint.
• The scratch test
Scrape firmly over the render or the old paint with an old screwdriver. If the render is friable or crumbly, you should strip back the render at the affected sites a few millimetres deep and render again with a repair filler. This also applies to old paint that will not support painting: if this flakes off in the test , it must be removed using a pressure washer and a sanding machine. Small cracks can be filled with acrylic filler or repair grout.
• The knocking test
Using a hammer, knock on a piece of wood placed on the render. If the render below begins to crumble, or if there are voids beneath the render layer, you need to break these open and clean and fill again with repair filler. If larger areas have broken off, you should use the original render. Please note: freshly applied mineral renders should only be painted over after four to six weeks, as the paint layer could otherwise be destroyed. Also, synthetic resin and dispersion renders must left for at least one week to completely set.
To determine whether the new render has sufficiently dried, you should also reach for our BM31 Electronic Moisture Detector. The instrument uses a dielectric measurement method, i.e. the moisture detection takes place non-destructively, as no electrodes or probes are inserted into the object being tested.
• The absorption test
For this, apply water to the wall using a sponge. Now you can see by the discolouration, or by the fact that water runs off, how absorbent the facade is. If the water is directly absorbed, then you must in any case apply a primer, otherwise the paint layer will show stripes and its durability will be reduced.
Further preparatory work – covering and priming
The facade has been inspected and repaired? Good – then you can begin by covering windows and doors with film. Attach the film carefully at the borders, for example under the roof gutters and at the windows. Apply the primer in accordance with the manufacturer’s instructions. For a preliminary coat with the exterior wall paint to be used later, dilute it with 10 to 15 percent water.
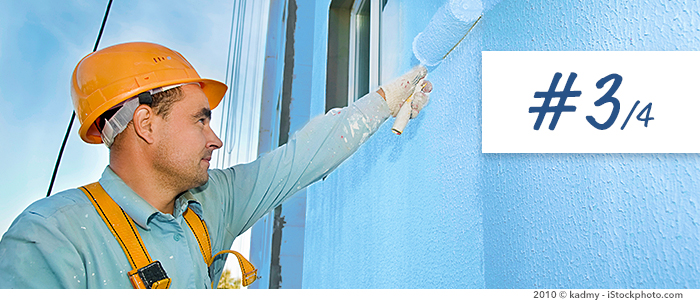
Painting the facade
Here is where your experience painting interior walls comes into its own: just as in this case, first paint the edges, corners and angles that you cannot reach with the paint roller. Do not paint all edges at once, but work successively so that you are able to paint the surrounding free areas with the paint roller before the paint is dry. Here you should paint generously into the free areas. This effectively “wet-in-wet” painting technique helps to avoid the later formation of patches.
To prevent further ugly patches from forming in the first place, you should paint the facade in a crosswise fashion. First paint from right to left and back again, and then from top to bottom, or the other way around. This ensures that the exterior wall paint builds up in layers and the paint is applied evenly.
BM31 Moisture Detector – makes renovation easier
The BM31 is immediately ready for use and is persuasive through its fast reaction time during measurement, and at the push of a button it shows not only the current real-time value, but also the minimum and maximum values on the back-lit display. Order today the BM31 Moisture Meter for, instead of £ 71.02, now for only £ 48.58 incl. VAT – in our Trotec-Shop now!
